Five things you need to know before you practice embroidery.
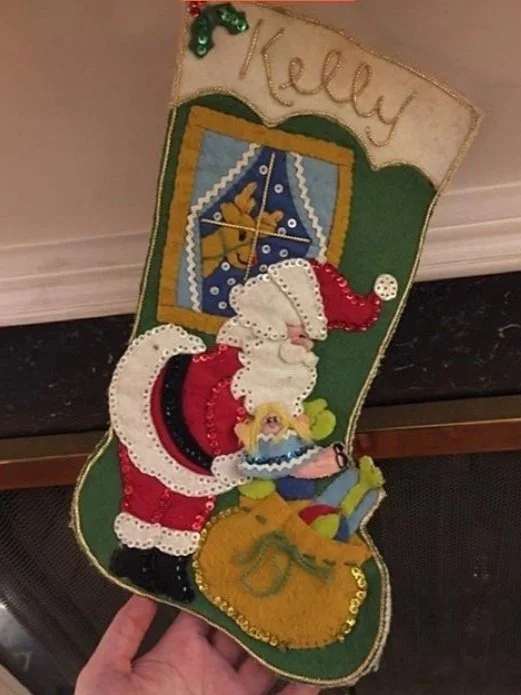
My personal felt Christmas stocking, made by great-grandma Mable. Materials include felt, glass seed beads, sequins, and gold trim.
When I dove into embroidery, it was quite an accident. My great-grandmother Mable had gifted her grandchildren and great-grandchildren a Christmas stocking. This hand-sewn, appliqued, bead-and sequin-adorned Christmas stocking, was my favorite part of Christmas morning.
TLDR: Skip ahead to the list. I have places to be!
I loved running my hands over the beads and sequins, imagining my great-grandmother stitching each one for her each baby in the family. I remember thinking, “Santa must think this stocking is special because he’s on it!”
In my late twenties or early thirties, I posted a picture of my stocking on Facebook and Instagram. I posted the photo with a comment about wondering how my great-grandmother created it.
A dear friend’s mom commented, “Kelly, I think that looks like Bucilla stocking. They used to make kits, maybe they still do.” So began my google-search-rabbit-hole adventure. Pretty sure I lost hours browsing that night.

The first stocking I ever completed took a whole year and then some. This is why I only buy Bucilla/Plaid kits now!
My first embroidery project did not go smoothly.
My stocking from great-grandma Mable was not made with a Plaid/Bucilla kit; I actually found unopened original kits for my and my sister’s stockings on eBay!
In 2016, having never successfully embroidered a single thing and having not hand-sewn anything in some years, I bought my first felt stocking kit to create. (It was also not the Bucilla brand.)
I started the kit around October 2016 and completed it at the tail end of 2017, if that tells you anything. It was a journey.
I didn’t even remember how to thread and knot off my thread on the needle properly! And here’s the thing about me:
I am not good at not knowing how to do something. (Especially in front of people.) my anxiety goes from zero to 5,000 at the thought of doing something I don’t know how to do yet.
You may be thinking, “But Kelly! How do you ever learn if you don’t ever want to do anything for the first time!”
To this, I say, “It sometimes takes months, or even years of preparation, positive self-talk, staring longingly at a new project for hours, trying to picture it in my head. But I’ve seen me do it.”
I was so overwhelmed with that first kit that I made shit up as I went. I guessed at different stitch diagrams (my brain does not process visual diagrams) or sometimes completed whole stocking kits with literally only one kind of embroidery stitch. I’d occasionally call my masterful mother for help.
But I got it done.
And eventually, after finishing a few stockings, I started to feel good at it. No matter how many flaws I saw in any of the stocking gifts I made, everyone around me thought they were delightful and beautiful. After two years of winging it, I looked up YouTube tutorials to learn the different embroidery stitches. (Shout out to Michelle Wood for everything you’ve taught me!) One stitch at a time, though, so as not to overwhelm my anxious mind.
Here I am, seven years or so from where I began, not only creating beautiful, heirloom-quality Christmas stockings, wall hangings, and Christmas ornaments but also designing and stitching embroidery hoops!
I started to think about what I wished I’d known when I started. So, without further adieu, here are…

Artist credit: Mel Poole @melpoole
Skeins of embroidery floss in different colors, wrapped around floss bobbins.
Five things you need to know before you start embroidering.
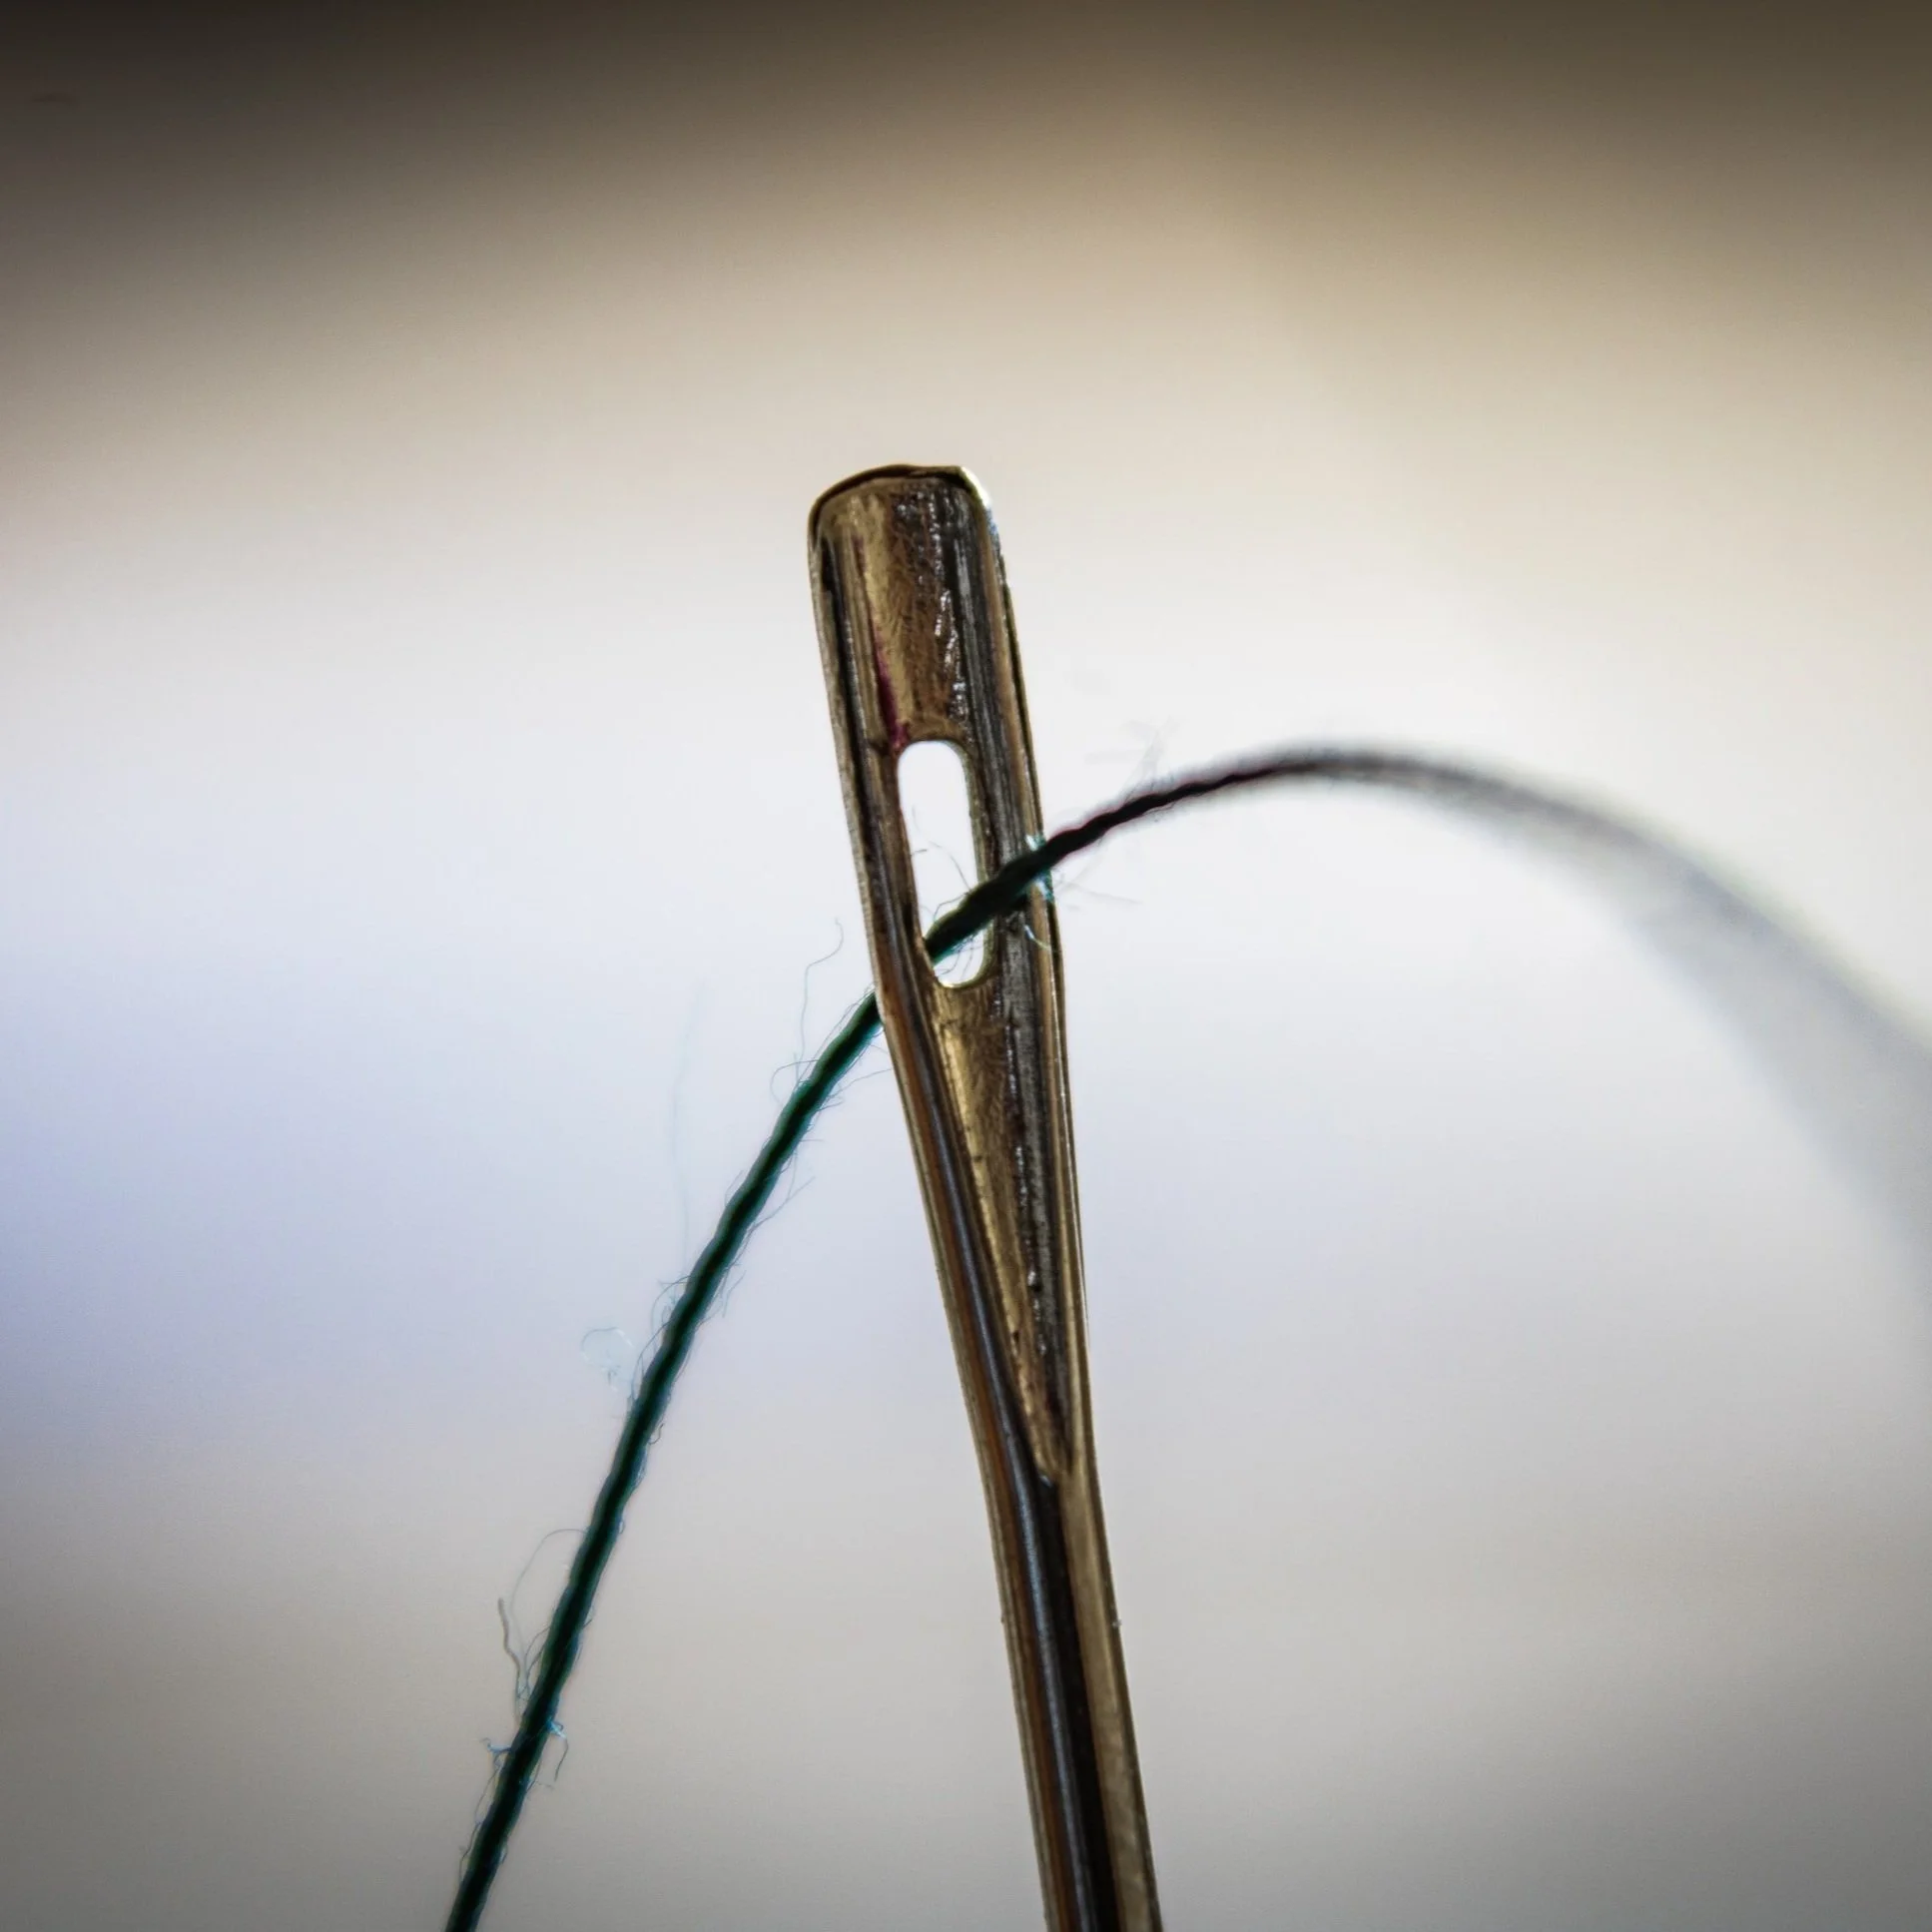
Artist credit: SUNBEAM PHOTOGRAPHY @sstoppo
A close-up photograph of a single thread guided through the eye of a sewing needle.
Embroidery floss is a fancy name for a bundle of thread.
The most basic and essential thing you need to know before you begin embroidering is that a skein of embroidery floss is comprised f of six individual threads! The more thread you use, the thicker your lines or stitches. So, for instance, if you follow a pattern or kit, and the instructions tell you “red (2),” you want to use two strands of red thread out of your embroidery floss. If you want a very bold line, you will use four or six strands.
The quality of your Embroidery floss matters greatly.
When budget is a dominating factor, you tend to use whatever thread you purchase with an embroidery or applique kit. After all, you’ve already paid for the materials. I spent about six years using only embroidery supplies included in the Plaid/Bucilla stocking and decor kits I purchased. You may also find inexpensive embroidery floss and sewing needles on sites like Amazon.
Do yourself a favor now, and stock up on DMC embroidery floss (affiliate link!) or comparable high-quality 100% cotton embroidery floss. Do it before you spend years battling thread drag, constant knots and tangles in your thread, and lackluster showcase stitches. DMC embroidery floss is much more pleasant to work with and has incredible shine. There’s no comparison with what is included in most embroidery and applique kits. If budget is a concern like it was for me, use Thread Magic! (Another affiliate link!) Thread Magic is a waxy substance that coats your thread to glide more smoothly through fabric or felt. Please keep it in a warm place so that it doesn’t harden on you or create clumps on your thread.
Don’t use needles that shred your thread!
Did you know that needles can have tiny little burs in those tiny little eyes of theirs? I’m here to tell you that they sure can! When using a needle with burs in the eye, you’ll find yourself shredding your thread in the middle of a row of stitching. Fraying of the thread may be present. Whatever signs you see of a bur in your needle eye, throw the damn thing in the trash and save yourself hours of frustration! I recently discovered these (affiliate link!) colorEYES needles, which help my aging eyes quite a bit.
Perfection isn’t a thing with embroidery and hand-Sewing.
Say it as many times as you need until you believe it, especially my neuro-spicy people:
Handmade gifts are not supposed to be perfect. My projects will be made with love, and that’s what matters most.
My friend’s mom told me when I was making my first machine-sewn dog coat: “Perfection isn’t a thing in sewing, Kelly, you’re going to have to learn to let that go.” I have to say this to myself every time my tremor changes the trajectory of an outline stitch or when my french knots don’t match just right! Not for nothin’, but messy and done is better than perfect and pending, any day.
Beading needles and sewing needles are different.
Beading needles tend to be longer, finer, and more flexible. If you plan to include beads in any of your embroidery work, or you plan to make a felt applique kit as I do, you’ll want to make sure to get some beading needs. Sizes 10 and 11 are the most standard, and if you’re using glass seed beads on something like a felt stocking kit, you’ll definitely need size 10.
And in the spirit of “messy and done is better than perfect and pending,” I am closing out this blog.
Because I’ve been arguing with it about inserting one last image anywhere in the neighborhood of where I want that image to display.
I have lost hours of my life that I can never get back.
I hope you enjoyed the journey, lol.